Welcome to our comprehensive WordPress tutorial for beginners, where we will demystify the process of creating a stunning website from scratch.
In today’s digital age, having an online presence is paramount for individuals and businesses alike. Whether you’re an aspiring blogger, a passionate entrepreneur, or a small business owner seeking to expand your reach, creating a website has become an essential step towards success.
Whether you aspire to build a personal blog, an e-commerce store, or a portfolio website, our WordPress guide will lay the foundation for your online success.
Section 1: Getting Started
1.1 Understanding WordPress: An Introduction to the Platform
Discover the world of WordPress, the versatile and user-friendly platform that has empowered millions to build stunning websites with ease. In this comprehensive introduction, we delve into the essence of WordPress, its origins, and its remarkable capabilities.
Get ready to unleash your creativity and unlock the power of WordPress!
1.2 Choosing a Domain Name and Web Hosting Provider
Choosing a Domain Name for Your WordPress Website:
Reflect your brand:
Your domain name should align with your brand identity and be memorable. Consider incorporating your business name, keywords relevant to your industry, or a creative phrase that captures the essence of your website.
Keep it simple and concise:
A short and easy-to-spell domain name is more likely to be remembered by visitors. Avoid using numbers, hyphens, or complicated words that can cause confusion.
Consider SEO:
Including relevant keywords in your domain name can improve your website’s search engine optimization (SEO). Conduct keyword research to identify popular search terms related to your niche.
Check for domain availability:
Before settling on a domain name, ensure that it is available for registration. Utilize domain search tools provided by domain registrars to check availability and secure your chosen domain.
Choosing a Web Hosting Provider for Your WordPress Website:
Evaluate performance and reliability:
Look for a web hosting provider that offers reliable uptime and fast server response times. A reputable provider with robust infrastructure will ensure your website loads quickly and remains accessible to visitors.
Consider scalability:
As your website grows, you may require additional resources. Choose a web hosting provider that offers scalability options, allowing you to easily upgrade your hosting plan to accommodate increased traffic and data requirements.
Prioritize security:
Website security is vital for protecting your data and maintaining the trust of your visitors. Opt for a hosting provider that offers SSL certificates, regular backups, firewall protection, and other security features to safeguard your website.
Evaluate customer support:
A reliable web hosting provider should offer responsive and knowledgeable customer support. Look for providers with 24/7 support via various channels, such as live chat, email, or phone, ensuring you can quickly resolve any issues that may arise.
Consider pricing and value:
Compare the pricing plans of different web hosting providers, considering the features and resources included. Look for a balance between affordability and the quality of services provided.
Read reviews and seek recommendations:
Before finalizing your choice, read customer reviews and seek recommendations from other WordPress users. This can provide valuable insights into the reputation and reliability of various web hosting providers.
1.3 Installing WordPress: A Step-by-Step Guide
Installing a WordPress theme is an exciting step in customizing the appearance of your website. Here’s a brief explanation of how to install a WordPress theme:
Choose a theme:
Begin by selecting a theme that aligns with your website’s style and purpose. You can explore the vast collection of free themes available in the WordPress theme directory or consider purchasing the best premium themes from a reputable theme marketplace.
Access the WordPress dashboard:
Log in to your WordPress website’s admin area by entering your credentials. Once logged in, you’ll be directed to the WordPress dashboard, the central hub for managing your site’s content and settings.
Navigate to the “Appearance” section:
In the WordPress dashboard, locate the “Appearance” tab in the sidebar. Hover over it, and a submenu will appear.
Click on “Themes”:
From the “Appearance” submenu, click on the “Themes” option. This will take you to the themes management page.
Add a new theme:
On the themes management page, click on the “Add New” button. Here, you can browse through a wide range of themes, search for specific keywords, or filter by different criteria.
Install the theme:
Once you’ve found a theme you like, hover over it, and you’ll see two options: “Preview” and “Install.” Click on “Install” to initiate the theme installation process.
Activate the theme:
After the theme is successfully installed, you’ll see an “Activate” button. Click on it to activate the theme and make it the active design for your website.
Customize the theme:
Depending on the theme you’ve chosen, you may have options to customize its appearance and settings. Explore the theme customization options under the “Appearance” or “Customize” section in the WordPress dashboard to personalize your website further.
Preview and refine:
Before finalizing your theme, take advantage of the “Preview” feature to see how your website will look with the selected theme. Make any necessary adjustments or try different themes until you’re satisfied with the visual representation of your site.
Section 2: Navigating the WordPress Dashboard
2.1 Exploring the Dashboard: An Overview of WordPress Backend
The WordPress dashboard is the control center of your website, providing you with a user-friendly interface to manage and customize your site’s content, appearance, and functionality. Here’s a brief explanation of the WordPress backend and its key features:
Accessing the dashboard:
To access the WordPress dashboard, log in to your website’s admin area using your credentials. Typically, you can reach the dashboard by adding “/wp-admin” to the end of your website’s URL (e.g., www.yourwebsite.com/wp-admin).
Dashboard layout:
Upon logging in, you’ll be greeted with the dashboard’s main screen. The layout may vary slightly depending on your WordPress version or installed plugins, but generally, it consists of a sidebar and a main content area.
Sidebar menu:
The sidebar menu provides easy navigation to various sections and settings of your WordPress site. It includes options such as Posts (for creating and managing blog posts), Pages (for creating and managing static pages), Media (for managing uploaded images and files), Appearance (for managing themes and customizing the website’s design), Plugins (for installing, activating, and managing plugins), and Settings (for configuring various site settings).
Quick draft and activity:
The dashboard often includes helpful widgets such as Quick Draft, where you can jot down ideas for future posts, and Activity, which shows recent comments, updates, and other site-related notifications.
Posts and Pages:
Through the dashboard, you can create, edit, and manage your website’s content. “Posts” are typically used for blog articles, while “Pages” are used for static content like the homepage, about page, and contact page.
Media Library:
The Media Library allows you to upload and manage images, videos, and other media files used on your website. You can organize your files, edit their details, and easily insert them into posts and pages.
Appearance and Themes:
Under the Appearance section, you can manage themes and customize the design of your website. You can install new themes, activate and deactivate them, customize their settings, and modify elements like the header, footer, colors, and layout.
Plugins:
The Plugins section enables you to extend the functionality of your WordPress site. You can search and install plugins from the WordPress repository or upload and activate premium plugins. Plugins can add features such as contact forms, social media integration, SEO optimization, and more.
Settings:
The Settings section allows you to configure various site settings, including general settings (site title, tagline, and URL), reading settings (homepage display, blog pages), discussion settings (comments and moderation), and more. These settings play a crucial role in customizing the behavior and functionality of your website.
2.2 Customizing Your Profile and Settings
WordPress allows you to personalize your profile and adjust various settings to tailor your experience and manage your website efficiently. Here’s a short explanation of how you can customize your profile and settings in WordPress:
Accessing your profile: To customize your profile, log in to the WordPress dashboard and click on your username in the top right corner. This will take you to your profile page.
Editing your profile information: On your profile page, you can modify essential details such as your display name, email address, and biography. You can also upload a profile picture or avatar that will be displayed on your website.
Managing user roles and permissions: Depending on your user role, you may have access to certain capabilities within WordPress. Administrators have full control, while other roles like editors, authors, or contributors have specific permissions. You can adjust user roles and permissions under the “Users” section in the dashboard.
Customizing your password: To enhance security, it’s recommended to regularly update your password. You can change your password from the profile page by clicking on the “Generate Password” button or entering a new password manually.
Adjusting your notification settings: WordPress allows you to control the email notifications you receive for various events, such as comments, updates, or new user registrations. You can manage your notification preferences from the “Settings” section in the dashboard.
2.3 Understanding Posts vs. Pages: Creating and Managing Content
Posts: Posts are typically used for blog articles and time-sensitive content. They are displayed in reverse chronological order, with the latest post appearing at the top. Posts often have categories and tags, making it easy to organize and categorize your blog content.
Pages: Pages, on the other hand, are used for static content that doesn’t change frequently. Examples of pages include the homepage, about page, contact page, and services page. Pages are not organized by date and do not have categories or tags.
Creating posts: To create a new post, log in to the WordPress dashboard and navigate to the “Posts” section. Click on “Add New” to create a new post. Enter a title, write your content using the visual editor, and customize other settings such as categories, tags, and featured images.
Managing posts: Once you have published posts, you can manage them from the “Posts” section. You can edit, delete, or categorize posts, as well as moderate comments on individual posts.
Section 3: Designing Your Website
3.1 Customizing Your Theme: Using the WordPress Customizer
Customizing your WordPress theme is an essential step in building a website that reflects your brand and personality. Luckily, WordPress comes with a built-in Customizer tool that allows you to make changes to your website’s appearance without any coding knowledge.
To access the Customizer, simply navigate to Appearance > Customize from your WordPress dashboard. From there, you can change everything from colors and fonts to layout and background images.
Using the WordPress Customizer is a great way for beginners to get started customizing their websites without feeling overwhelmed by complicated code or design software.
3.2 Creating a Navigation Menu
Creating a Navigation Menu is an essential part of designing your WordPress website. It helps visitors navigate through your site with ease, finding the information they need quickly and efficiently.
3.3 Adding and Managing Widgets
Adding and managing widgets in WordPress is a great way to enhance the functionality of your website. Widgets are small blocks that can be added to specific areas of your site, such as sidebars or footers.
To add a widget, go to Appearance > Widgets in your WordPress dashboard. From here, you can drag and drop widgets into the desired widget area. You can also click on each widget to customize its settings.
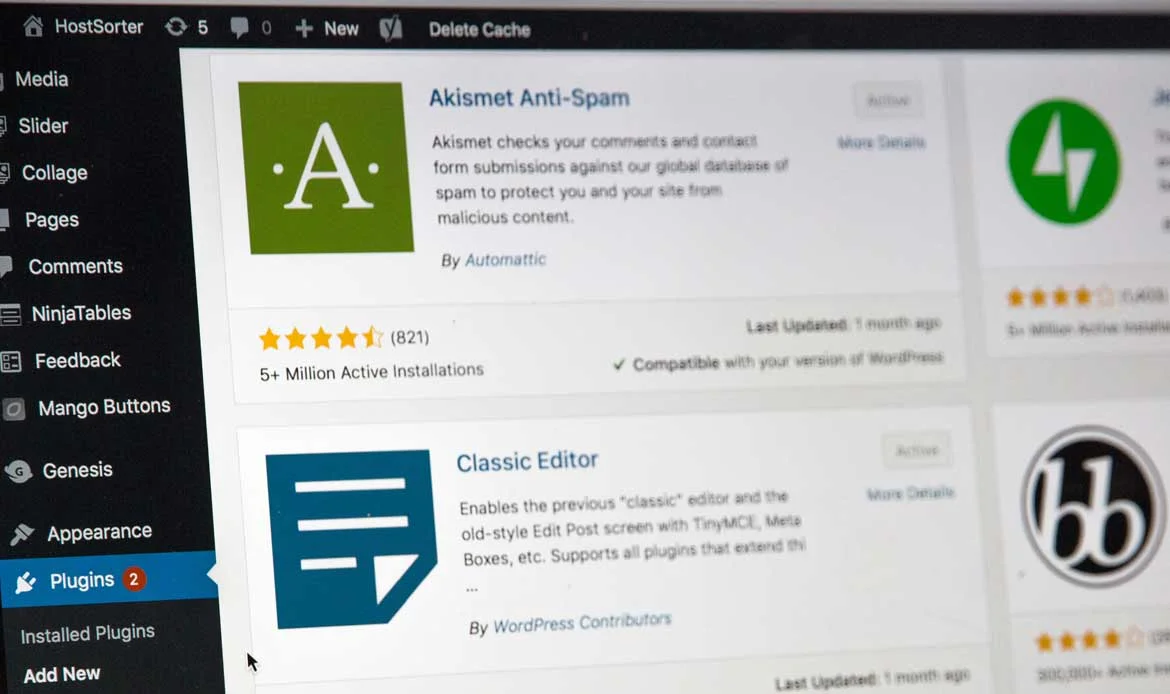
3.4 Enhancing Your Website with Plugins
One of the biggest advantages of using WordPress is its vast plugin library. With over 55,000 plugins available, website owners can easily enhance their site’s functionality without needing to know how to code.
Plugins allow you to add features such as contact forms, social media sharing buttons and search engine optimization tools with just a few clicks. They are easy to install and use, making them incredibly useful for beginners.
Section 4: Creating Engaging Content

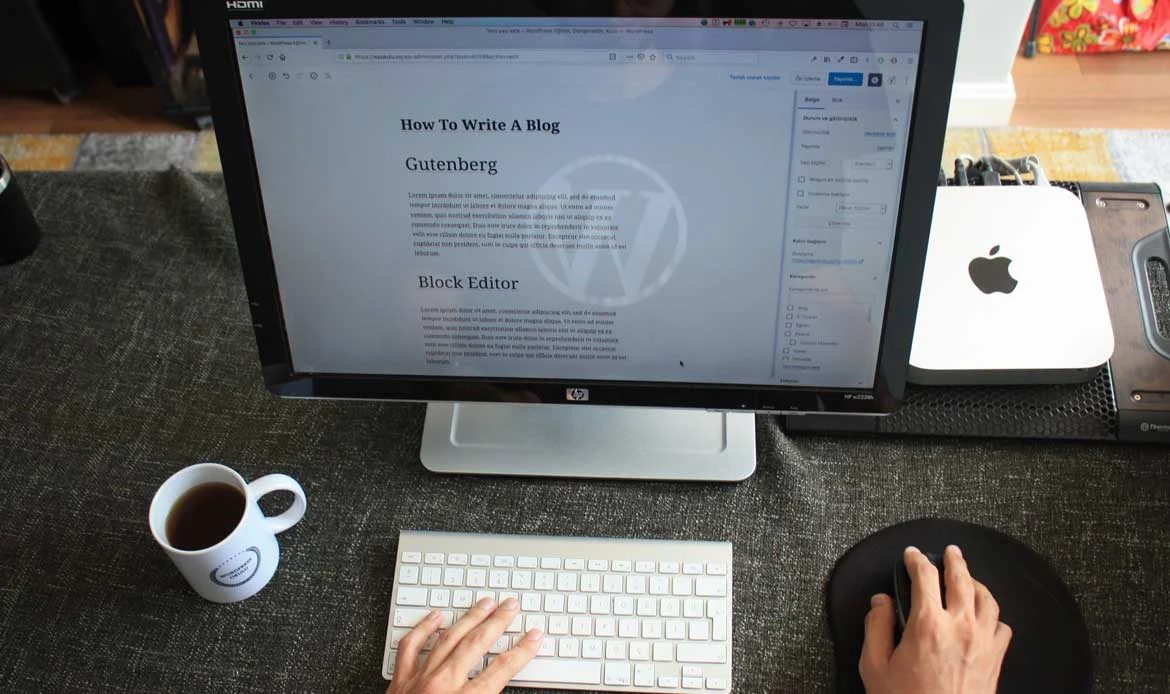
4.1 Writing and Formatting Blog Posts
Writing and formatting blog posts is a crucial aspect of creating content for your WordPress website. To begin, it’s important to have a clear understanding of what you want to convey in your post. This can involve researching the topic, collecting data and organizing your thoughts.
Once you’ve identified the core message of your post, it’s time to start writing. Make sure to use short sentences and paragraphs that are easy to read and understand. Additionally, using headers will help break up the text into digestible chunks.
It’s also essential that you proofread your work thoroughly before publishing it live on your site. This will ensure that there are no typos or grammatical errors that could detract from the quality of your content.
Taking care when writing and formatting blog posts can result in higher engagement rates from readers as they’ll find it easier to follow along with what you’re saying.
4.2 Enhancing Your Content with Media: Images, Videos, and Audio
Adding media to your website can make a huge difference in the overall user experience. It can break up text-heavy pages and posts and provide visual interest that keeps readers engaged. In this section of our WP Tutorial for Beginners, we’ll cover how to add images, videos, and audio files to your content.
Images are an essential element of any website as they immediately grab a reader’s attention. To insert an image into your post or page on WordPress, simply click ‘Add Media’ in the toolbar above the editor. From there you can either upload a new image or select one from your media library.
Audio is another type of media that can be used effectively on websites. It allows visitors to listen while they read if they prefer not to watch videos since some people find it hard reading long articles with just texts alone.
4.3 Optimizing Your Content for SEO
Optimizing your content for SEO is one of the most important aspects of building a successful WordPress website. By optimizing your content, you are making it easier for search engines to find and rank your website.
One way to optimize your content for SEO is by using relevant keywords throughout your text. This will help search engines understand what your page is all about and match it with relevant searches.
Internal linking between blog posts within your site can also boost SEO rankings by helping visitors find related articles while keeping them on-site longer. Regularly updating old posts with new information keeps them fresh and signals activity to search engines, improving overall website authority.
4.4 Using Featured Images and Excerpts
Using Featured Images and Excerpts is an essential aspect of creating engaging content on your WordPress website. A featured image, also known as a post thumbnail, can be added to each blog post to give readers a preview of what the article is about visually.
When selecting a featured image for your post, it’s important to choose something that accurately represents the content and will grab readers’ attention. The image should be high-quality and relevant to the topic at hand.
In addition to featuring images, using excerpts can also improve the readability of your website. An excerpt is a short summary of your blog post that appears before the full text in search engine results or archive pages.
4.5 Managing Comments and Engaging with Readers
One of the most important aspects of running a website is engaging with your readers by managing comments. Your blog posts are likely to receive feedback, questions or suggestions from visitors and it’s essential to respond in a timely manner.
Firstly, make sure to enable comment moderation and set up notifications so you can approve comments before they go live on your site. This will help filter out spammy or inappropriate content.
Remember that negative feedback can be turned into positive opportunities for improvement. If someone leaves a critical comment, don’t ignore it or delete it – instead use it as an opportunity to improve your content or user experience.
Section 5: Extending Your Website’s Functionality With Plugins
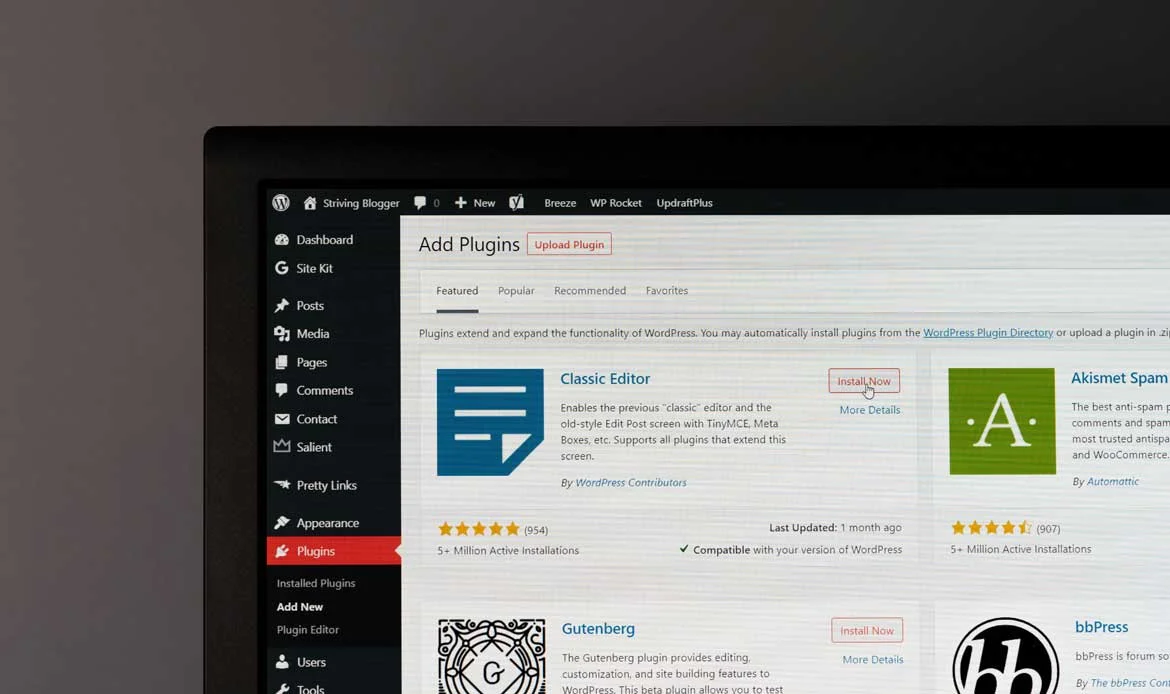
5.1 Installing and Activating Plugins
Plugins are the backbone of WordPress, allowing users to extend the functionality of their website. Installing and activating plugins is a simple process that can greatly enhance your site’s performance.
To install a plugin, go to your WordPress dashboard and click on “Plugins” in the left-hand menu. From there, click on “Add New” and search for the plugin you want to install. Once you find it, click on “Install Now.”
After installing a plugin, be sure to activate it by clicking on “Activate.” Some plugins may require additional setup or configuration before they can be used.
5.2 Integrating Social Media Sharing and Subscription Forms
Integrating Social Media Sharing and Subscription Forms is an essential step in creating a cohesive online presence for your website. With social media integration, you can increase the visibility of your content by allowing readers to share it on their own networks with just one click. This not only drives traffic to your website but also improves engagement with your audience.
Integrating social media sharing and subscription forms is crucial when building a successful website. It helps boost engagement, increase traffic and solidify relationships with loyal followers.
Section 6: Advanced Tips and Techniques
6.1 Creating Custom Page Templates
Creating Custom Page Templates in WordPress is a great way to customize the look and feel of your website. With custom page templates, you can create unique layouts for different pages on your site without having to touch any code.
To get started with creating custom page templates, simply go to your WordPress dashboard and navigate to the “Pages” section. From there, click “Add New” and choose a name for your new page.
Once you’ve created your new page, click on the “Page Attributes” box on the right-hand side of the screen. Here, you’ll see an option called “Template”. Click on this option and select “New Template”.
6.2 Backing Up Your WordPress Site
Backing up your WordPress site is a crucial step to ensure the safety of your website’s data. In case something unexpected happens, like a hacker attack or server crash, having a backup means you can quickly restore your site and avoid losing all of your hard work.
There are several methods to back up your WordPress site, including manual backups and using plugins specifically designed for this task. Manual backups involve downloading all of your website files and database through FTP or cPanel, but it can be time-consuming and requires technical knowledge.
6.3 Ensuring Website Security: Best Practices and Plugins
Ensuring website security is of utmost importance for every WordPress beginner. Hackers are always on the lookout to exploit vulnerabilities and gain unauthorized access to websites.
To secure your website, start by using strong passwords for all user accounts and regularly updating them. Additionally, you can install a security plugin that scans your site for any suspicious activity and blocks potential threats.
6.5 Monitoring Website Performance and Speed Optimization
Monitoring website performance and optimizing speed is crucial for any website owner. A slow-loading site can lead to a poor user experience, increased bounce rates, and lower search engine rankings. Here are some tips on how to monitor your website’s performance and optimize its speed:
Firstly, use tools like Google PageSpeed Insights or GTmetrix to analyze your site’s loading time and identify areas that need improvement. These tools provide detailed reports on page load times, images optimization, caching issues, etc.
Secondly, compress your images without sacrificing quality using image compression plugins like WP Smush or EWWW Image Optimizer. Large images can drastically slow down your website’s loading time.
Section 7: Launching Your Website

7.1 Publishing Your Website: Making it Live
Let’s talk about making your website live. To do this you’ll need to purchase hosting services and a domain name. Once these are set up, you can export your content from the development environment to the live server using migration tools like Duplicator or All-in-One WP Migration.
Frequently Asked Questions About Getting Started with WordPress for Beginners
Is WordPress suitable for beginners with no coding experience?
Yes, WordPress is designed to be user-friendly, allowing beginners to create professional websites without coding. With its visual editor, drag-and-drop builders, and pre-designed themes, you can easily build and customize your site.
How do I install WordPress for the first time?
You can install WordPress using your web host’s one-click installer or manually through FTP. Most hosting providers, like Bluehost or SiteGround, offer automated WordPress installation options to simplify the setup process.
What are the essential plugins beginners should use?
Some must-have plugins for beginners include Yoast SEO for search optimization, Elementor for design, UpdraftPlus for backups, and WP Super Cache for performance. These tools make managing your WordPress site easier and more efficient.
Conclusion
Congratulations! You’ve completed our comprehensive WordPress beginners tutorial By now, you have a solid understanding of how WordPress works and have built your own website from scratch. Remember, WordPress is a dynamic platform that constantly evolves, so continue to explore, experiment, and learn new techniques to enhance your website’s functionality and design.
Whether you’re a blogger, an online store owner, or a creative professional, WordPress offers endless possibilities for you to showcase your ideas, products, and services to the world. Embrace the power of WordPress, unleash your creativity, and let your website shine on the digital stage!
Start Your WordPress Journey with Ease
Getting started with WordPress can seem overwhelming, but with the right guidance, beginners can quickly create professional websites.