Are you grappling with the perplexing issue of your Sidebar Below Content Error in WordPress? Fret not, as we embark on a journey to unravel the mysteries of this common but irksome challenge.
Troubleshooting the enigmatic Sidebar Below Content Error requires a keen eye for detail and a strategic approach. As we unravel the complexities, we’ll equip you with actionable steps to not only fix the issue but also gain a deeper understanding of the underlying factors.
Our comprehensive guide will walk you through the intricacies of CSS adjustments, theme considerations, and potential plugin conflicts. No stone will be left unturned as we address the nuances that contribute to this layout hiccup.
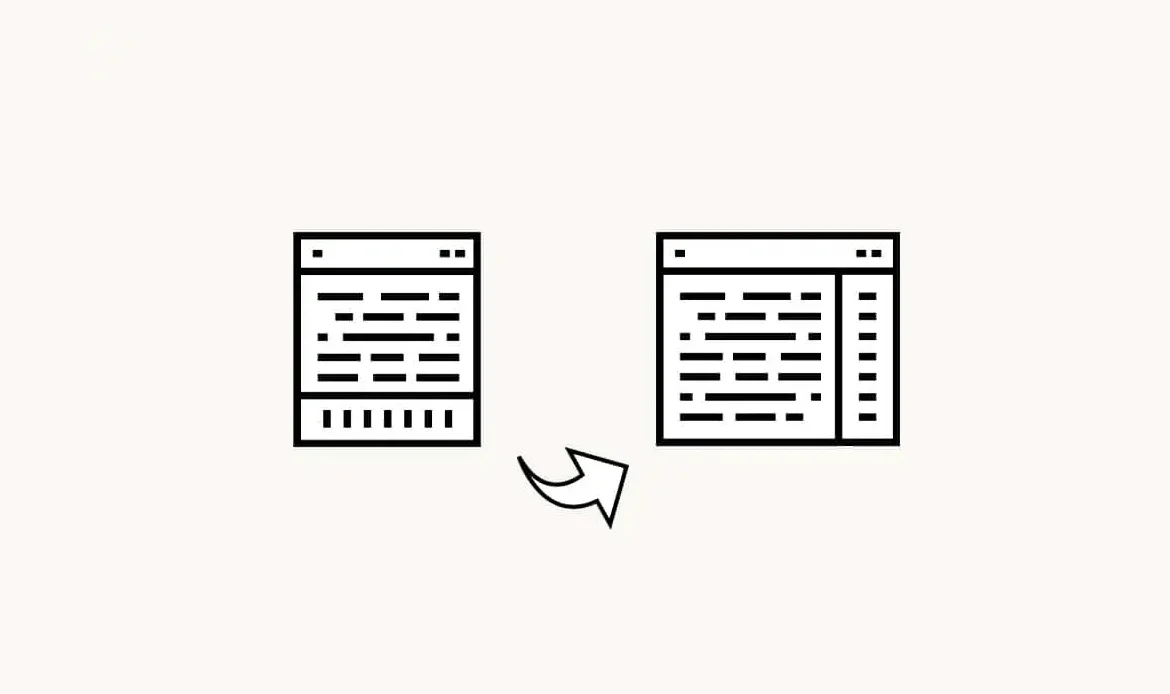
Common Causes of the Sidebar Dropping Below the Content
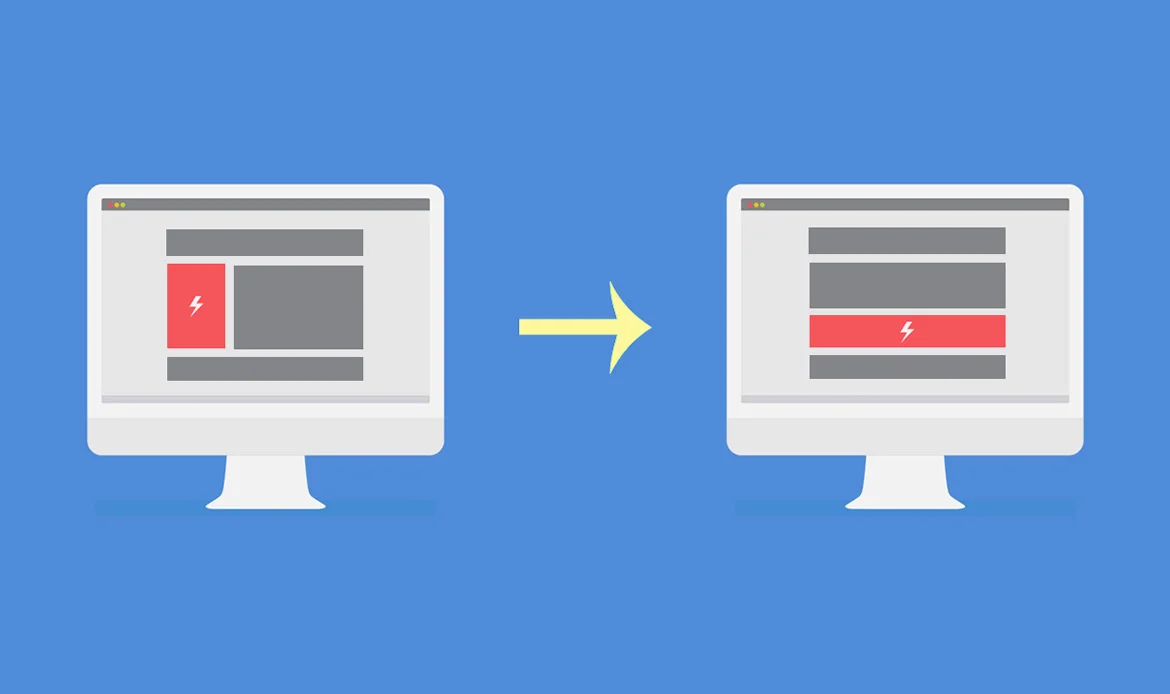 The sidebar dropping below the content in WordPress can be caused by various factors related to theme structure, CSS styles, and layout configurations. Here are some common causes:
CSS Float Issues
The use of the CSS float property for positioning elements can lead to problems if not handled correctly. If the sidebar and content elements have conflicting float values, it may cause the sidebar to drop below the content.Width Mismatch
Incorrectly set widths for the content and sidebar elements can result in layout problems. Ensure that the combined width of the content and sidebar does not exceed the width of the container.Missing Clearfix
If floated elements are not properly cleared, it can disrupt the layout. Adding a clearfix to the container can resolve issues related to floating elements.Responsive Design Challenges
In responsive designs, the styles for smaller screens may not be configured correctly. Make sure that media queries are applied appropriately, and widths are adjusted for various screen sizes.Theme Customizations
If you’ve made customizations directly to the theme files and overlooked the impact on the layout, it might lead to unexpected issues. This is especially true if modifications are made without using a child theme.Plugin Conflicts:
Certain plugins might introduce styles or scripts that conflict with your theme’s layout, causing the sidebar to drop below the content. Deactivating plugins one by one and checking for changes can help identify the conflicting plugin.Outdated Theme or WordPress Version
Using an outdated theme or WordPress version may lead to compatibility issues. Ensure that both your theme and WordPress installation are up to date.Custom Styles Overriding Theme Styles
If custom styles added through theme options or additional CSS override the default theme styles, it can impact the layout. Check for conflicting styles within the WordPress Customizer or theme settings.JavaScript Errors
JavaScript errors can disrupt the loading and rendering of elements on the page, potentially causing layout issues. Check the browser console for any JavaScript errors.Container Padding and Margin Issues
Padding and margin settings for the container element might affect the layout. Ensure that these settings are appropriate and not causing unintended spacing issues. Identifying the specific cause of the sidebar dropping below the content involves careful inspection of the theme files, CSS styles, and potential conflicts with plugins. By systematically addressing these common causes, you can troubleshoot and resolve the layout issue in your WordPress site.How to Fix the WordPress Sidebar Below Content Error
Step 1: Identify the Issue
Before diving into the fix, it’s crucial to identify what’s causing the problem. Possible culprits include conflicting CSS styles, theme settings, or problematic plugins. Use browser developer tools to inspect the elements and styles applied to the sidebar and content.Step 2: Access Theme Editor
- Navigate to your WordPress dashboard.
- Go to “Appearance” and select “Theme Editor.”
- Locate the file responsible for the layout, usually style.css or a similar stylesheet.
Why Use the Theme Editor?
The Theme Editor in WordPress provides a convenient way to make direct changes to your theme’s files without needing an external code editor. It’s essential for users who want to customize their themes but may not have access to the theme files on the server. However, caution is advised when using the Theme Editor, as making incorrect changes can potentially break your site. Always create backups before making modifications, and consider using a child theme to preserve changes during theme updates.Step 3: Check CSS Styles
Look for Styles Related to Sidebar and Content:
When you access the Theme Editor and locate the file (typically style.css), search for CSS styles that specifically control the layout of the sidebar (#sidebar) and content (#content). These styles dictate how these elements are positioned and how much space they occupy on the page.Common Styles:
Two common CSS properties used for layout are float and width. The float property determines how an element should be floated, and the width property sets the width of an element.
#content {
    float: left;
    width: 70%;
}

#sidebar {
    float: right;
    width: 30%;
}
In this example, the content is set to float left, taking up 70% of the container width, and the sidebar is set to float right, occupying 30% of the container width.
Ensure Total Width Doesn’t Exceed Container Width:
It’s crucial to ensure that the combined width of #content and #sidebar doesn’t exceed the width of their container. If the total width surpasses the container width, it can lead to layout issues, including the Sidebar Below Content Error. Adjust the percentages in the CSS styles if needed to maintain a total width that fits within the container.Why Check CSS Styles?
The CSS styles controlling the layout of the sidebar and content play a pivotal role in how these elements are displayed on your website. By reviewing and, if necessary, adjusting these styles, you can ensure that the layout is structured as intended. The provided CSS snippet demonstrates a common layout where the content and sidebar are floated to specific sides with defined widths. Careful consideration of these styles helps in maintaining a balanced and visually appealing layout, preventing issues like the sidebar dropping below the content.Step 4: Clear Floats
What is Clearfix:
Floats are commonly used in CSS to position elements horizontally. However, when elements are floated, it can sometimes lead to unexpected layout issues, particularly if the floated elements are not properly cleared. A clearfix is a technique used to address this issue.Clearfix CSS Rules:
The provided CSS rules define a clearfix. This is a pseudo-element (:after) that is added to an element to clear floated child elements.
.clearfix:after {
    content: "";
    display: table;
    clear: both;
}

#container:after {
    content: "";
    display: table;
    clear: both;
}
The :after pseudo-element generates an empty box after the specified element (#container in this case). The combination of display: table; and clear: both; ensures that the pseudo-element clears both the left and right-floated elements, effectively containing them within the container.
Apply the Clearfix Class:
To ensure proper clearing of floats, apply the clearfix class to the container element. In the provided example, the container element is represented by #container.
.clearfix {
    content: "";
    display: table;
    clear: both;
}
Applying this class to the container helps prevent layout issues caused by floated elements not being properly cleared.
Why Clear Floats?
When elements are floated, they are taken out of the normal document flow, which can lead to layout issues such as elements not expanding to contain floated elements. The clearfix technique is employed to ensure that the parent container properly encloses its floated children.
By adding a clearfix, you prevent unexpected layout problems, such as the sidebar dropping below the content, which is a common issue in WordPress layouts. This step is especially important when working with floated elements to maintain a clean and consistent layout.
Step 5: Responsive Styles
What are Responsive Styles:
Responsive web design aims to create a seamless user experience across various devices and screen sizes. Responsive styles involve adjusting the layout and design of a website based on the characteristics of the user’s device, such as its screen width.
Media Queries:
Media queries are a fundamental component of responsive design. They allow you to apply different styles based on the characteristics of the user’s device. In the provided example, a media query is used to specify styles for screens with a maximum width of 768 pixels./
@media (max-width: 768px) {
    #content, #sidebar {
        width: 100%;
    }
}
This media query targets screens with a maximum width of 768 pixels.
Adjusting Width for Smaller Screens:
Within the media query, the styles for #content and #sidebar are adjusted to width: 100%;. This means that on devices with a screen width of 768 pixels or less, both the content and sidebar will take up the full width of the screen.
Why Use Responsive Styles?
In a world where users access websites on a variety of devices, ensuring responsiveness is crucial for providing an optimal user experience. The provided responsive styles adapt the layout for smaller screens, preventing issues like horizontal scrolling and ensuring that content remains readable and visually appealing.
By incorporating media queries into your CSS, you enhance the accessibility and usability of your website across a diverse range of devices, from desktop monitors to tablets and smartphones.
Step 6: Deactivate Plugins
WordPress plugins can sometimes introduce conflicts with the theme or other plugins, leading to unexpected layout issues like the Sidebar Below Content Error. Deactivating plugins is a crucial step in the troubleshooting process to identify the specific plugin causing the problem.Deactivate All Plugins:
- Go to your WordPress dashboard.
- Navigate to “Plugins” and select “Installed Plugins.”
- Select all plugins and choose the “Deactivate” option from the bulk actions dropdown.
Check if the Issue Persists:
After deactivating all plugins, check your website to see if the Sidebar Below Content Error still exists. If the issue disappears, it indicates that one (or more) of the plugins was causing the conflict.Reactivate Each Plugin One by One:
- Begin reactivating your plugins one at a time.
- After activating each plugin, refresh your website and check if the Sidebar Below Content Error reappears.
- Continue this process until you notice the issue returning.
Identify the Culprit Plugin:
The plugin that, when reactivated, causes the Sidebar Below Content Error to return is likely the culprit. Once identified, you have several options:- Seek Alternatives: If the plugin is not crucial to your website’s functionality, consider finding alternative plugins that don’t conflict with your theme.
- Contact the Plugin Developer: If the plugin is essential, reach out to the plugin developer or support forum for assistance. They may provide a fix or be aware of the issue and have recommendations.
Why Deactivate Plugins?
Deactivating plugins temporarily helps to isolate the problem. By systematically reactivating each plugin, you can pinpoint which one is causing the conflict. Plugins can affect the layout by introducing their own styles, scripts, or conflicting with the theme’s code. Identifying and resolving these conflicts is key to maintaining a stable and visually pleasing WordPress website.Step 7: Update WordPress and Theme
WordPress, as a content management system, is regularly updated to introduce new features, enhance security, and improve overall performance. Similarly, themes receive updates from their developers to ensure compatibility with the latest version of WordPress and address any bugs or vulnerabilities. Here’s why updating both WordPress and your theme is crucial:Security:
Updates often include security patches to protect your website from potential vulnerabilities. Running an outdated version of WordPress or using an old theme can expose your site to security risks.Compatibility:
As WordPress evolves, so does its core functionality. Themes are designed to work seamlessly with specific versions of WordPress. Running an outdated theme on a newer version of WordPress or vice versa may result in compatibility issues, including layout problems like the Sidebar Below Content Error.Bug Fixes:
Updates also address bugs and glitches present in previous versions. These bugs can affect various aspects of your website, including layout and display issues.How to Update WordPress:
Automatic Updates:
Manual Update:
Theme Developer Notifications:
WordPress Theme Repository:
Child Themes:
WordPress has an automatic update feature that can automatically update your installation to the latest version. This feature is enabled by default for minor releases, but major updates may require manual intervention.
For major updates, you might need to manually initiate the update process. This involves going to the “Dashboard” > “Updates” section and clicking the “Update Now” button.
How to Update Your Theme:
Theme developers often release updates through their official channels. Check for notifications within your WordPress dashboard or visit the theme developer’s website for the latest version.
If you’re using a theme from the WordPress Theme Repository, you can update it directly from the “Themes” section in the WordPress dashboard.
If you’ve customized your theme, ensure you’re using a child theme. This way, you can update the parent theme without losing your modifications.
Why Update?
Ensuring that both WordPress and your theme are up to date is a proactive measure to maintain a secure, stable, and well-functioning website. By staying current, you reduce the likelihood of encountering unexpected issues, including layout problems such as the Sidebar Below Content Error. Regularly checking for updates and applying them helps keep your website running smoothly and in alignment with the latest web standards.
Step 8: Customizer Check
Navigate to the WordPress Customizer:Access the WordPress Customizer by going to “Appearance” and selecting “Customize.”
- Explore Layout Options: Within the Customizer, look for sections or panels related to layout settings. Depending on your theme, you may find options to control the arrangement of elements like the sidebar and content.
- Adjust Settings in Real-Time: The Customizer allows you to make changes and preview them in real-time. Experiment with layout-related options to see if adjustments can resolve the Sidebar Below Content Error without modifying theme files directly.
- Common Customization Areas: Some common areas for layout adjustments include “Layout,” “Sidebar,” or “Typography” sections. Explore these to modify width, alignment, or positioning settings.
- Save Changes: If you make adjustments that resolve the issue, save the changes in the Customizer. This ensures that your new layout settings are applied to your live site.
Why Use the Customizer?
The WordPress Customizer provides a user-friendly interface for making real-time changes to your website’s appearance. Many modern themes integrate customization options into the Customizer, offering a convenient way to adjust layouts without directly editing theme files. This step encourages users to leverage the built-in tools available in WordPress, promoting an accessible and user-friendly approach to website customization.
Step 9: Child Theme
- Evaluate Your Theme Modifications: If you’ve made direct changes to your theme files to address the Sidebar Below Content Error, take stock of those modifications.
- Consider Creating a Child Theme: To safeguard your customizations, consider creating a child theme. This is especially crucial if your theme is regularly updated.
- Preserve Customizations During Updates: A child theme acts as a protective layer for your customizations. When the main theme is updated, your changes remain intact, ensuring that the Sidebar Below Content Error fixes and any other modifications persist.
- Creating a Child Theme: Create a child theme by generating a new directory in your “themes” folder and setting up a style.css file. The child theme should reference the parent theme.
/*
Theme Name:   My Child Theme
Template:     parent-theme-folder-name
*/
Copy and Modify Files:
Copy the specific theme files you’ve modified to the child theme directory. Make your adjustments within the child theme, leaving the original theme files untouched.
Activate the Child Theme:Activate the child theme through the WordPress dashboard. This ensures that your site now uses the child theme with your preserved modifications.
Why Use a Child Theme?
Creating a child theme is a crucial step if you’ve made direct changes to theme files. It protects your customizations from being overwritten during theme updates, allowing you to benefit from new features and security patches without sacrificing the modifications you’ve implemented. This practice ensures a more sustainable and efficient approach to maintaining a customized WordPress website.
Step 10: Seek Professional Help
If, after following the steps, the issue persists, consider seeking assistance from WordPress forums or hiring a developer. Community forums often provide valuable insights, and developers can offer personalized solutions based on the intricacies of your theme and setup.Common Questions About Fixing Sidebar Below Content Issues in WordPress
Why does my WordPress sidebar appear below the content?
This usually happens due to theme layout issues, CSS conflicts, or unclosed HTML tags in your sidebar or content area. Fixing the structure or adjusting CSS often resolves it.
Can I fix the sidebar issue without coding?
Yes! Many WordPress themes allow you to adjust sidebar settings via the Customizer or page builder plugins. Simply checking widget areas and layout options can often fix the problem.
Which CSS changes help move the sidebar back to the correct position?
Applying CSS adjustments like setting proper floats, widths, or clearing elements can fix sidebar positioning. For example, ensuring your sidebar has float right or using Flexbox/Grid layout settings can correct alignment issues.
Conclusion
In the ever-evolving landscape of WordPress, conquering the Sidebar Below Content Error marks a triumph not just over a layout glitch but over the intricacies of web design itself. As we conclude our expedition through troubleshooting and fixing, remember that the challenges encountered today become the stepping stones of expertise tomorrow.
By navigating the twists and turns of CSS adjustments, theme intricacies, and plugin dynamics, you’ve not only resolved a pesky error but gained invaluable insights into the anatomy of WordPress layouts. Your website is now not just a destination but a well-crafted journey for your visitors.
Take pride in your journey, for it’s not just about fixing errors; it’s about mastering the art of WordPress design. Your site now stands not only corrected but elevated. Thank you for joining us on this quest for perfection in WordPress web design. Until the next adventure, happy troubleshooting!
Fix Your Sidebar Below Content Error in WordPress Today!
Is your WordPress sidebar showing up below your main content instead of beside it? Don’t worry — this common layout issue can be fixed in minutes! Learn how to correct theme structure, widget alignment, and CSS conflicts to restore your website’s professional appearance. Our responsive, SEO-optimized, and well-coded WordPress themes ensure perfect design balance and flawless layouts across all devices.